AWS Lex Integration
The AWS Lex integration sets out to remove some of the technical barriers when creating chatbots. Using your existing case workflows, the integration is designed to get you to a starting point on your chatbot journey.
By creating bridges across some of the lower level technical challenges that come with developing integrated chatbots, we allow you to focus your energy into shaping the experience and conversation of your intelligent service.
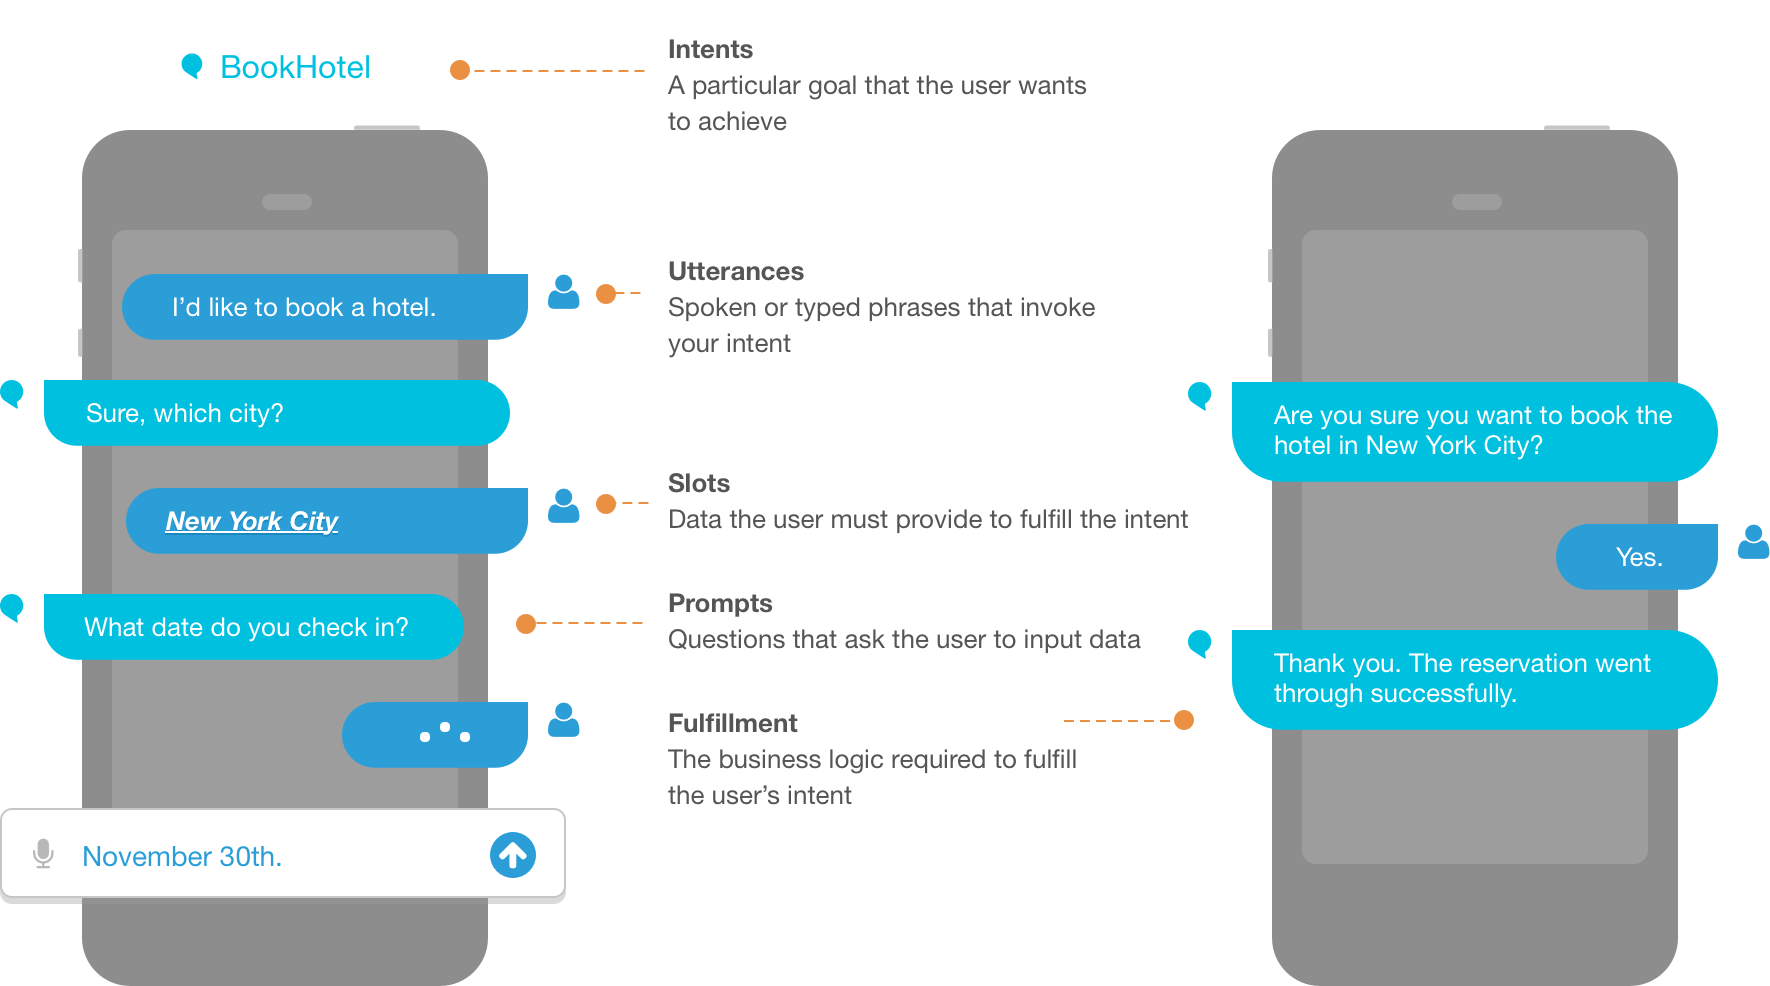 Image courtesy of Amazon Web Services https://docs.aws.amazon.com/lex/latest/dg/what-is.html
Prerequisites
There are a couple of prerequisites to getting started with the Lex integration. Firstly, you will need an AWS account. The Lex integration is not currently a managed service, therefore it is your responsibility to create an AWS account. Once created, the integration will create and configure the necessary services within that account.
It is advised that you use a different AWS account for each of your CXM environments (e.g. one for UAT, one for LIVE), this is because the integration currently only works against a single named bot (CXM_BOT) within an AWS account.
Head over to AWS to get started.
Next up we need a compatible case type in CXM. Whether a case type is compatible predominantly depends on the fields that are on the "Create Case" form. It is possible to use a case type with incompatible fields, however, these must not be required fields. Case types with required unsupported fields will not be available to select in the integrations mapping user interface.
Supported Fields
A supported field should be able to be effortlessly mapped to an Lex Slot. Fields with partial support can be mapped to a Lex Slot, however, there may be some additional configuration required within Lex to create the desired behaviour. Fields that are awaiting support are not currently available to map to a Lex Slot due to the nature of the information they contain.
| CXM Field Type | Support |
|---|---|
| Date | Supported |
| Date Time | Supported |
| Telephone | Supported |
| Supported | |
| Text | Supported |
| Text Area | Supported |
| Checkbox | Partial Support |
| Single Select Choice | Partial Support (limited to displaying 6 choices) |
| Multiple Select Choice | Awaiting Support |
| Address | Awaiting Support |
| Person | Awaiting Support |
| Organisation | Awaiting Support |
Note
An example of the extra work required to configure a field that has partial support could a single select choice field. This is a choice field within CXM that allows the selection of a single value.
The integration will create a new custom Slot Type, providing it has been mapped to the Create Custom Slot Type in our Slot Type mappings user interface in CXM - more information below. Then over in the AWS Lex Dashboard we might want to configure our bot to display our choices to a user, we are able to do this using the Slot Type Settings by adding a Prompt Response Card with buttons that map to our choices configured in CXM.
There is currently a limitation imposed by AWS to 6 buttons per Slot Type.
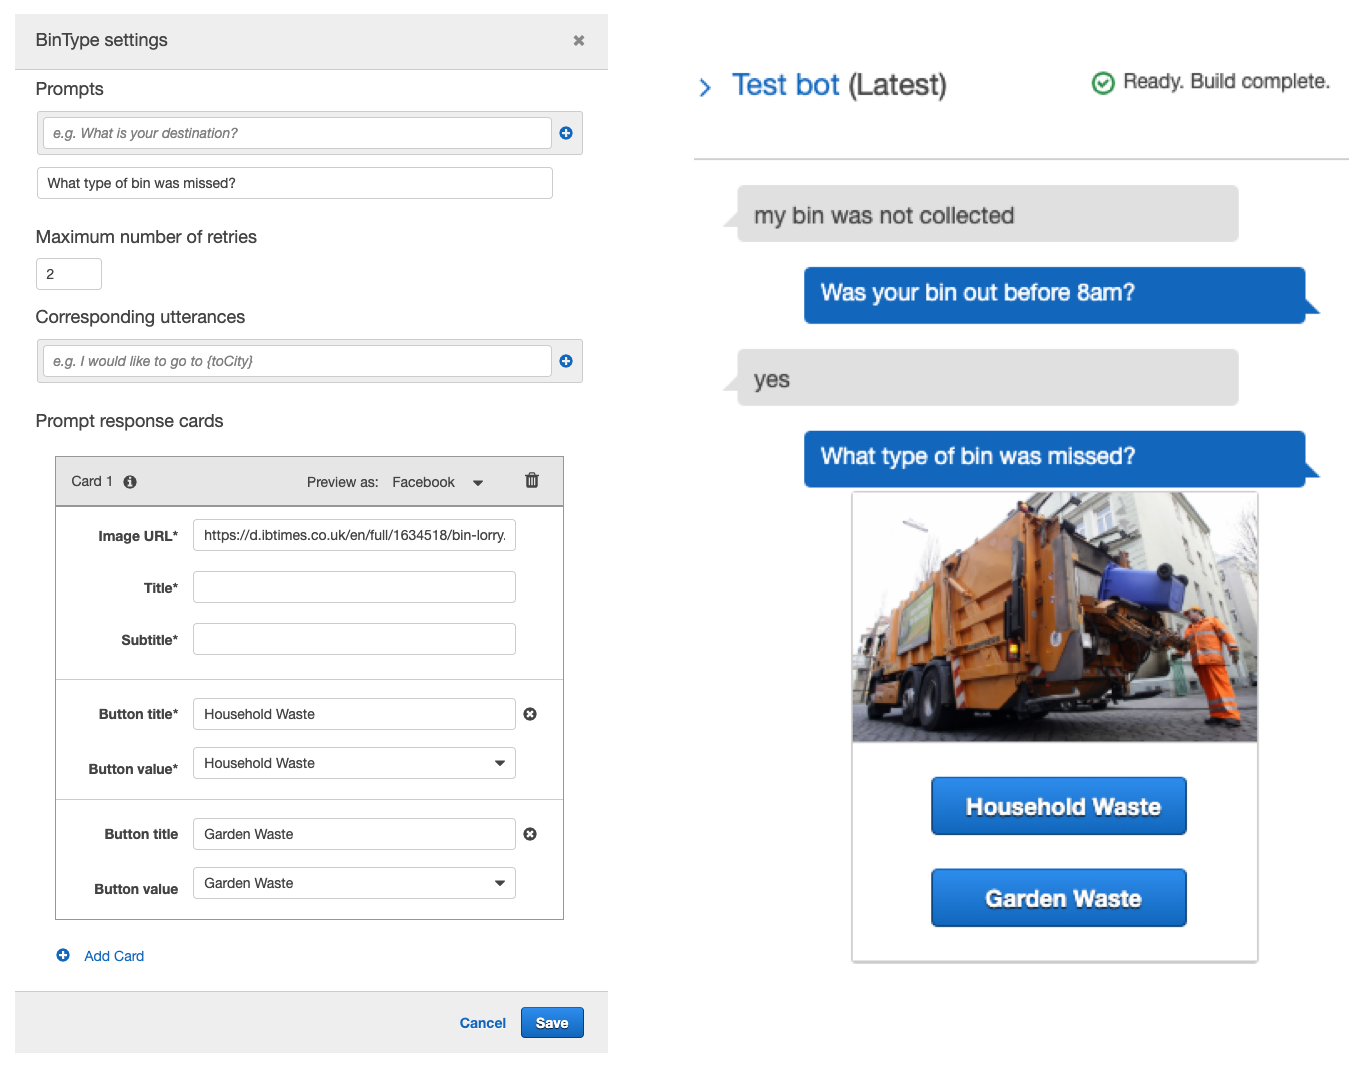 An example of a choice field manually mapped to a Prompt Response Card
General settings
On the General tab you can enable / disable the integration with Lex, and configure it's settings.
When you save the settings the integration will be enabled, CXM will attempt to connect to Lex to verify the settings.
If the connection fails, the settings will not be saved, and an error message detailing the reason for the failed connection will be displayed.
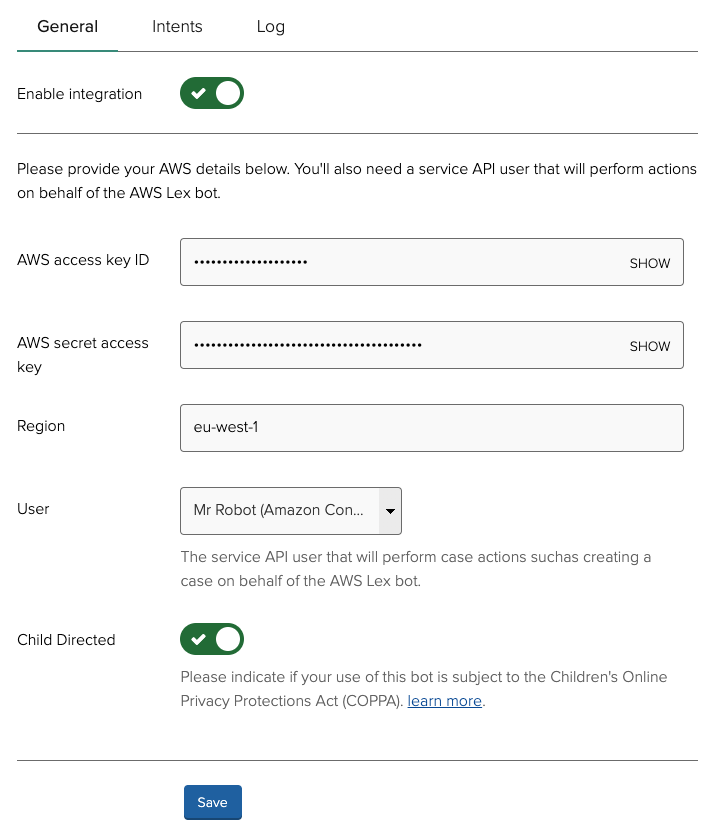
- AWS access key ID - This is the access key that connects CXM to your AWS account.
- AWS secret access key - This is another access key required to allow CXM to perform actions within your CXM account.
- Region - This is the AWS region that your services will be built in.
- User - This is the CXM user that will perform actions, such as creating cases, on behalf of your chatbot. This select box will display users that have a Service API Key. These can be created in
System > Service APIs. - Child Directed - This is a setting required by AWS, more information regarding COPPA is available on their website.
Note
The recommended region at this time is eu-west-1, whilst we do not expect complications within other regions, full support of additional regions is yet to be fully implemented and tested as part of the BETA program.
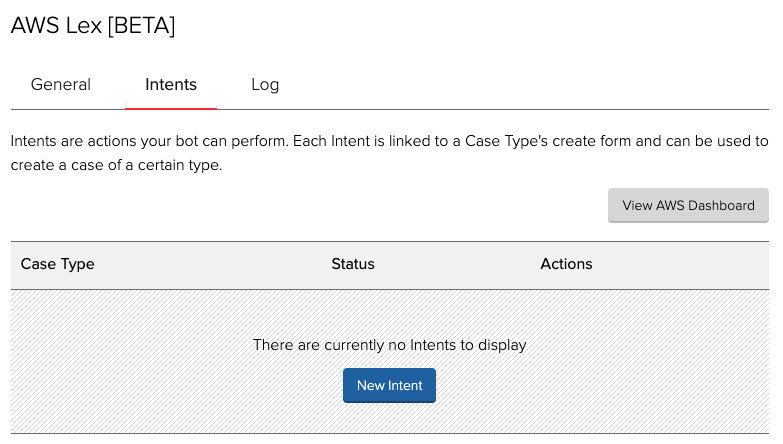
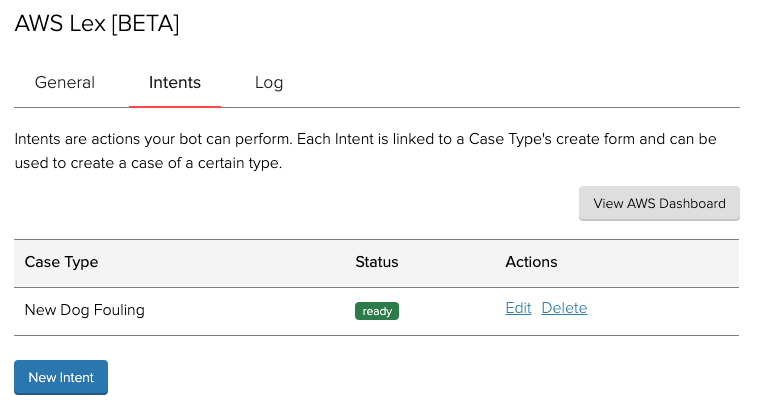
Intents
In the Intents tab we are able to create, edit and delete chatbot intents. An intent is a conversation our chatbot can facilitate. Another way of thinking about this is that an intent is something our chatbot can do.
The integration currently supports creating an intent that is linked to a case form, specifically a create case form. This means the integration will be able to create an intent that will allow our chatbot to have a conversation that will end up in a case being created in CXM, using questions/prompts that are derived from the case type's fields defined on the create form.
Slot Type Mappings
When we are creating or editing an Intent it is necessary to map our CXM field into types that our chatbots understand. The name for chatbot fields, or to put another way, the name for types of information our chatbot can understand, is Slot Types.
The Slot Type mapping interface displays the fields that are present on our case form on the left and a corresponding list of Slot Types on the right. You will see there are a number of available Slot Types to choose from, the majority of these are prefixed with AMAZON. and are maintained and trained by the team at AWS. Where possible we should aim to use these as much as we can in our workflow.
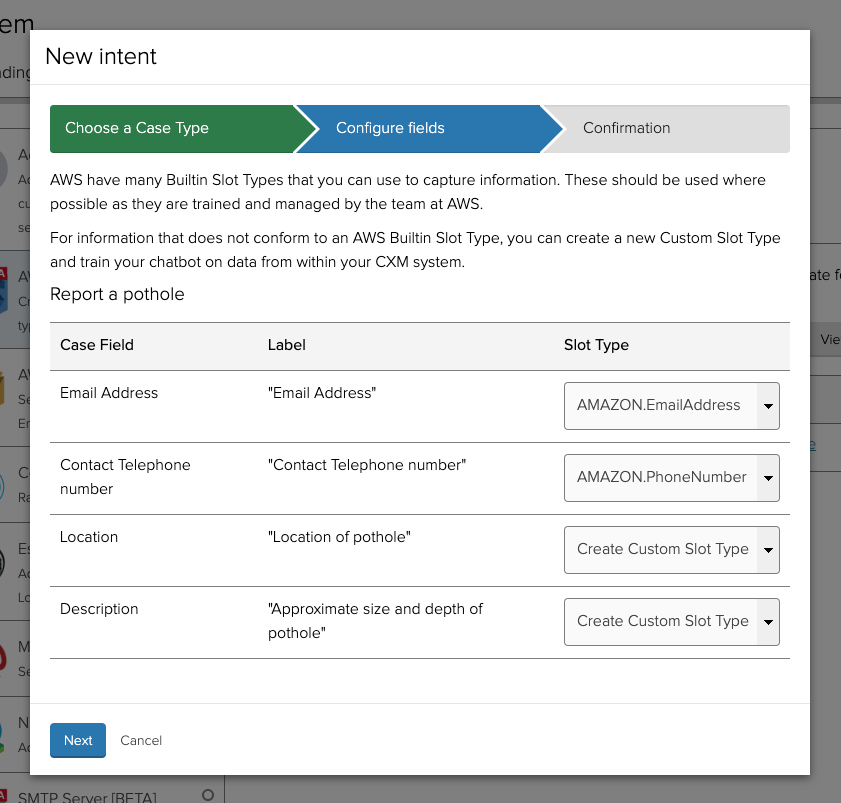
In instances where we have a data type – let's say pothole description, that is not in the list of AMAZON. prefixed Slot Types we have the option to Create Custom Slot Type. When selecting this option the integration will create a custom Slot Type within AWS and use data from your CXM account as a training data set.
In our pothole description example we will get all the values for that field from existing cases and send them to AWS to train our chatbot on how to identify pothole descriptions when interacting with humans.
Note
It is possible to provide training data from other sources than CXM. This can be done from within the AWS Lex dashboard. We might find this useful if we wanted to use an existing training data set sourced online, or if we have data from other systems than CXM.
Confirmation
Once we have created the mappings between our case form fields and our Slot Types it's time to confirm our settings and create an Intent. Once confirmed, the integration will go off and start creating the following resources in your account:
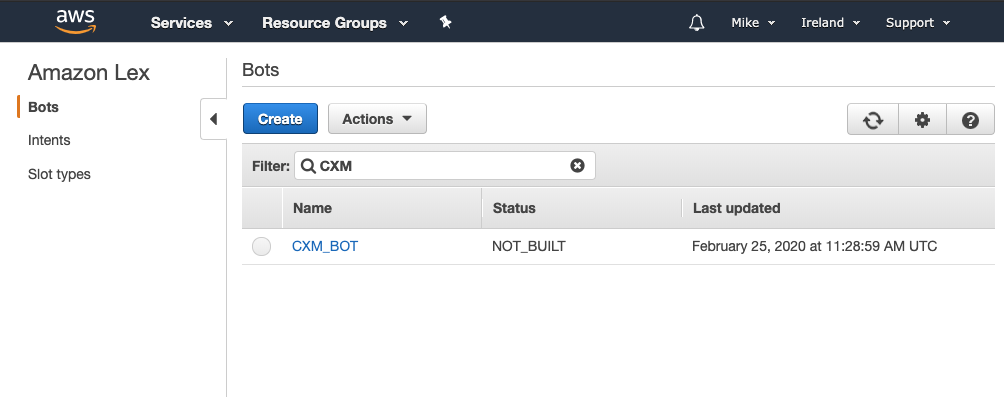
Lex Bot
We will create a new Lex Bot (providing one does not exist with the same name) called CXM_BOT.
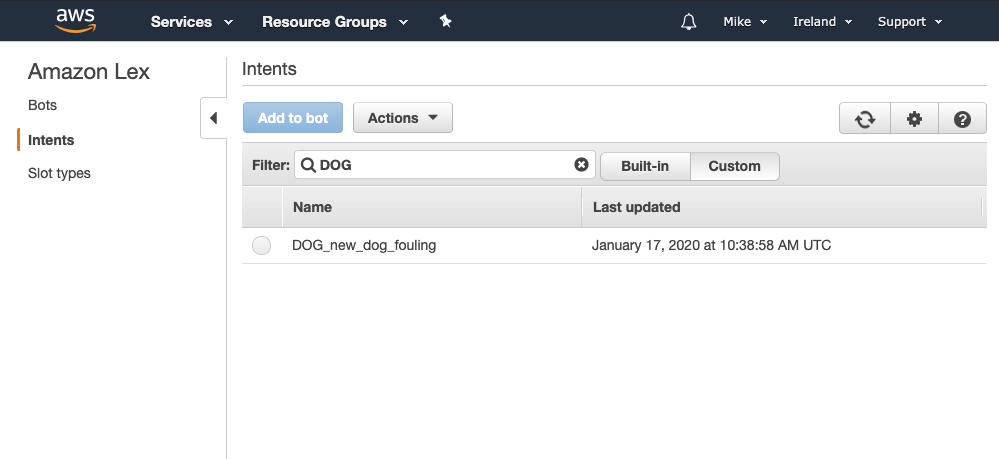
Lex Intent
We will create a new Intent which will have it's name derived from our CXM case type.
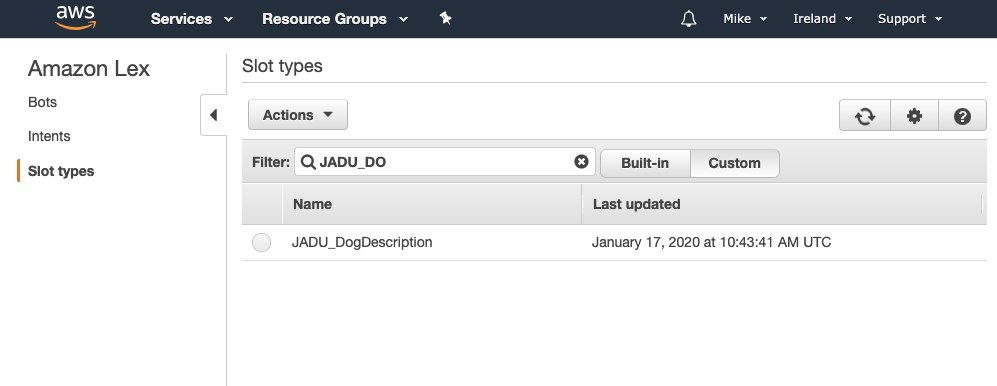
Lex Slot Type
For any mappings that we chose Create Custom Slot Type we will create a new Slot Type. Any custom slot types we create from CXM will be prefixed with JADU_.
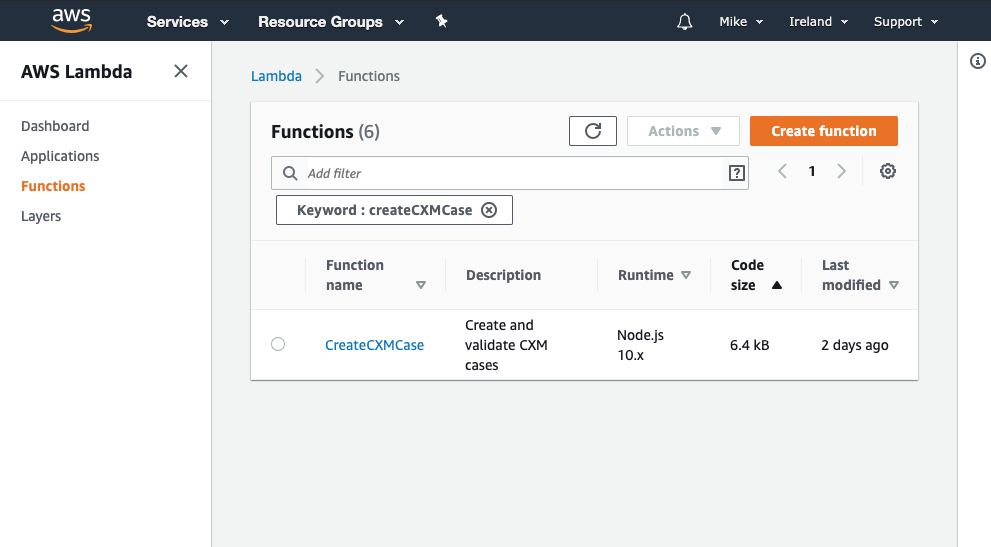
Lambda Function
In order to add more complex and integrated functionality to our chatbot we need to add a Lambda Function. This is a snippet of code that will be run when certain actions are performed by our bot. In order for our chatbot to be able to validate and communicate data with CXM we have provided a pre-made Lambda Function to do just that.
Note
It is possible to write and use your own Lambda Functions and use them with your chatbot. We might find this useful if we wanted to handle a conversation that requires information from a 3rd party system.
As an example a user might want to know which bin to put out when they wake up, in which case we could write a Lambda Function to interrogate our waste system and return the value to our user. As part of our BETA program we are aiming to make this process of adding additional functionality to your bot as streamlined and maintainable as possible.
Intent Created
The integration will create the above resources as a background task. We do this as it could take a few minutes to perform the necessary steps. Whilst the Intent is in it's building state you are free to leave the page and come back and check on it later, in most cases it should have completed in less than 5 minutes.
Once the integration has finished creating and preparing the resources on your AWS account you should see the status switch to ready. In the event there was an error during this process you will see the status error, any useful information we are able to provide will be added to the Log tab.
AWS Lex Dashboard
Once you have created your Intent it's time to head over to the AWS Lex Dashboard to start configuring your new chatbot.

Next Steps
This documentation covers the configuration and setup required within CXM. The next stage of creating your chatbot will take place within the AWS Lex Dashboard.
Resources
This is a list of some useful resources we've found to get you started with configuring your bot in the AWS Lex Dashboard. It's worth bearing in mind that with the integration we take care of setting up the bot for you, this means that you can safely skip past any sections of tutorial that are setting up resources from scratch in AWS.
"Building Intelligent Chatbots with Amazon Lex" - An official AWS video explaining some of core concepts that you will encounter and need to understand as part of your chatbot journey.
"Say Hello to Your Own Amazon Lex Chatbot" - A blog post with accompanying video of setting up a very basic
Intent."Quick Start — Develop a Chat Bot with AWS Lex" - A two part blog on getting to grips with AWS Lex & Lambda.
"AWS Lex Developer Guide" - The official AWS Lex documentation, this is a guide to everything Lex related.