Email Alerts
When a form is submitted in XFP, multiple email alerts can be sent. It may be necessary to send the user a receipt email, to acknowledge that the form has been submitted. Email alerts can also be used to notify internal departments and back office systems about the submission. The alerts to be sent can be configured in the emails tab of the form.
Creating an Email Alert
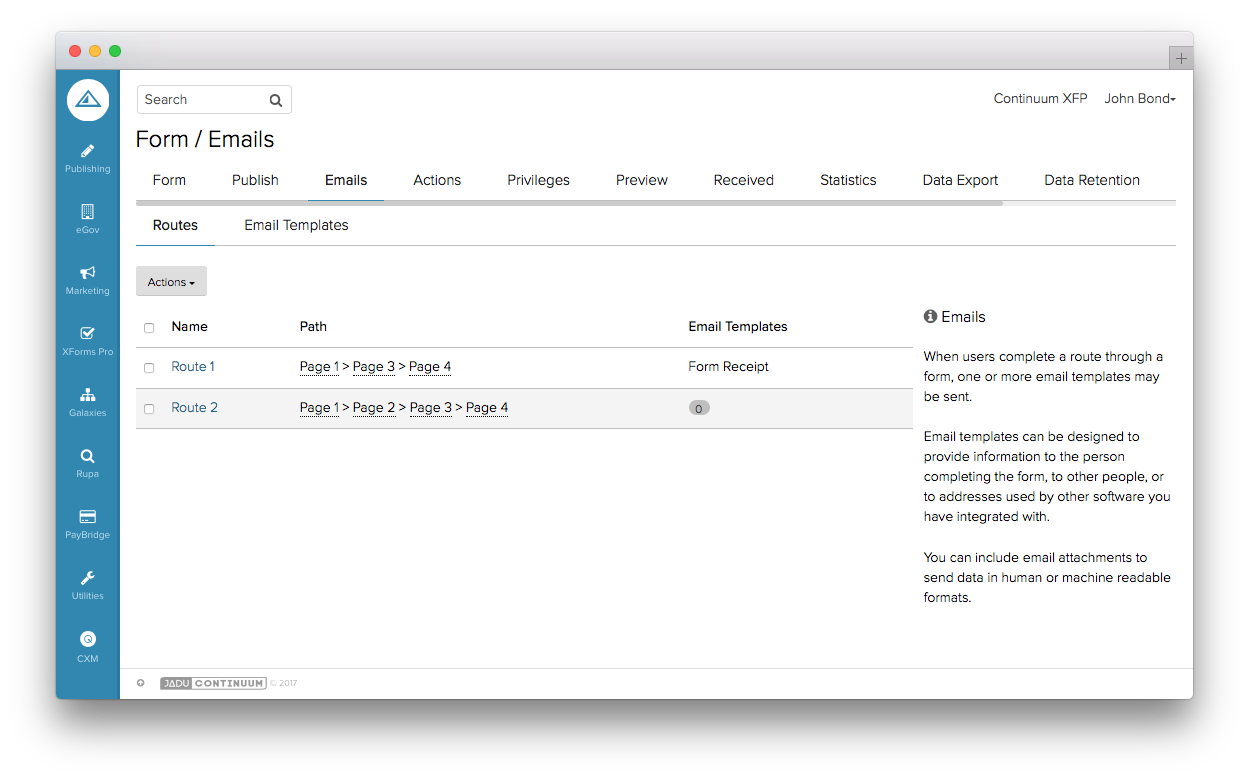 The Email Alerts interface
When the Emails tab is opened, it will show all the possible routes through the form, and which email templates are assigned to each route.
NOTE Hovering over the pages in the path column will show the page title.
Building an Email Template
Navigate to the 'Email Templates'. This interface shows every template that is contained on the form, and how many routes they are assigned to. To create a new template, click 'Create Template' on the right-hand side.
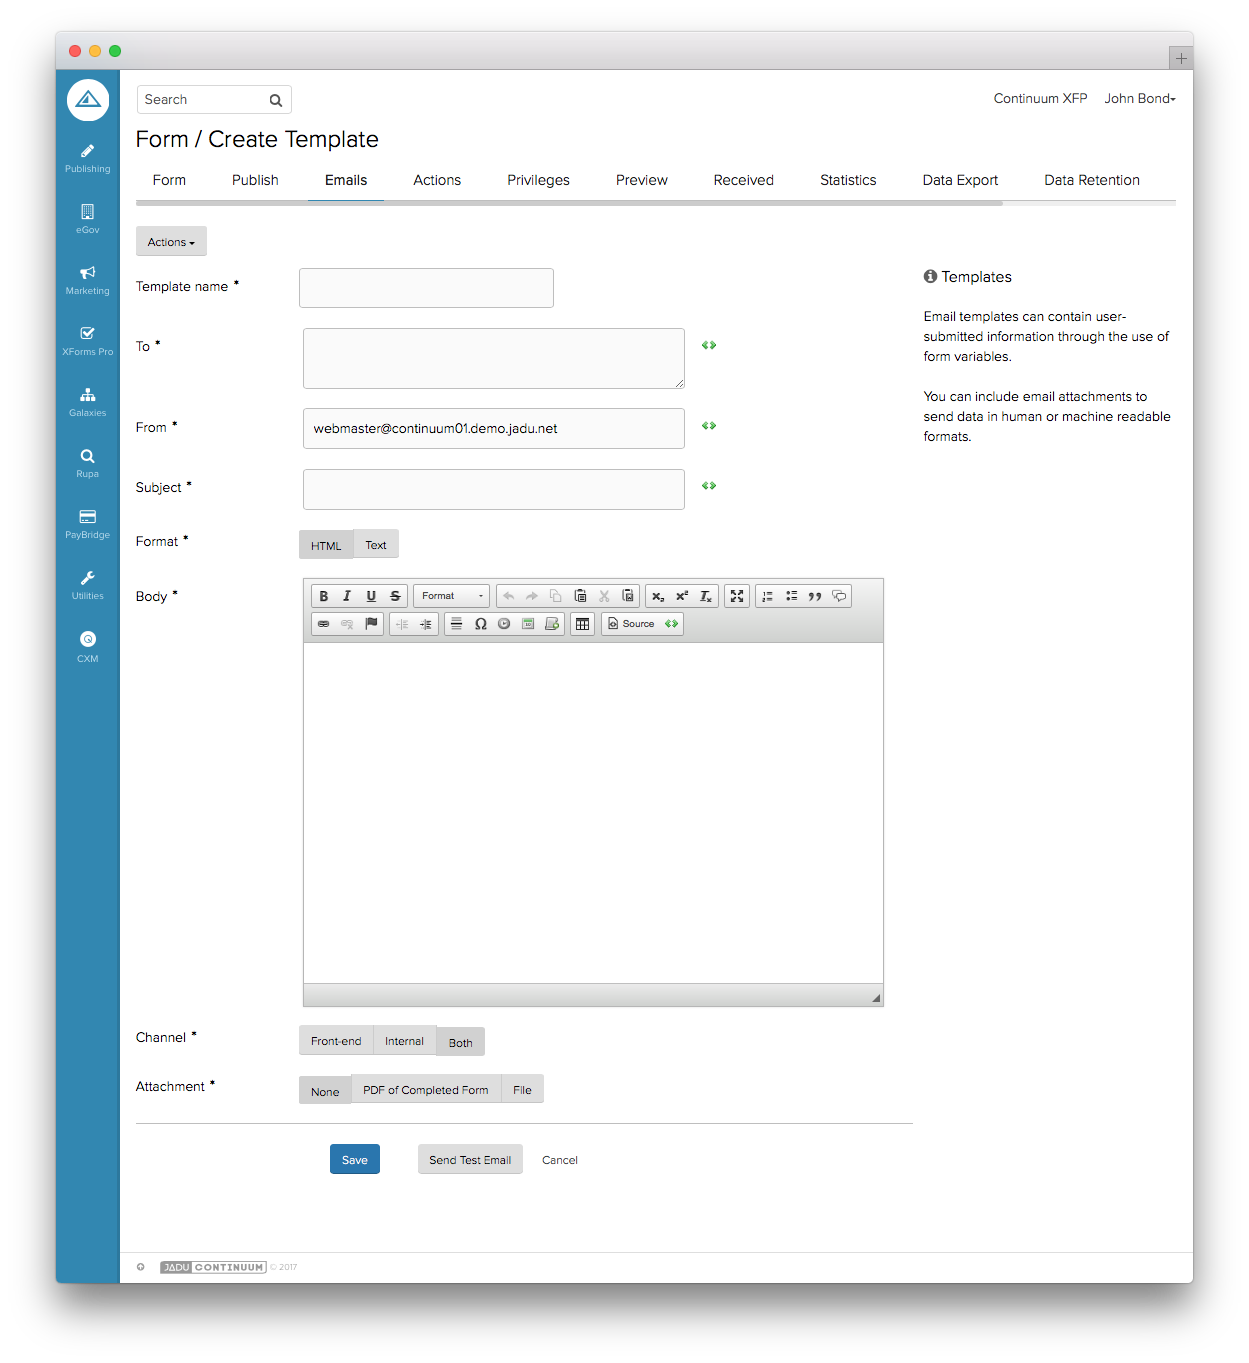 The Email Templates interface
When creating an email template, all fields must be completed. The to address, from address, subject and body fields can contain form variables. Multiple to addresses can be provided; these should be entered on seaprate lines in the to address field.
Adding an attachment to an Email Template
To add an attachment to your template, select either 'PDF of completed form' or 'File' for the 'Attachment' field.
If 'PDF of completed form' is selected, then the file generated by the PDF Generation Action will be attached to the alert, assuming this action is enabled and correctly configured.
If 'File' is chosen, more options will be displayed to allow you to configure exactly what is attached. The additional fields are the format of the attachment, and the attachment's content.
NOTE When adding a CSV attachment, leave the text area blank for XFP's default CSV structure to be attached.
NOTE Although XFP allows a choice of email attachments, it does not enforce that the structure of the attachment is valid. If using XML or CSV attachments, administrators must take care to ensure the structure of the attachment is correct.
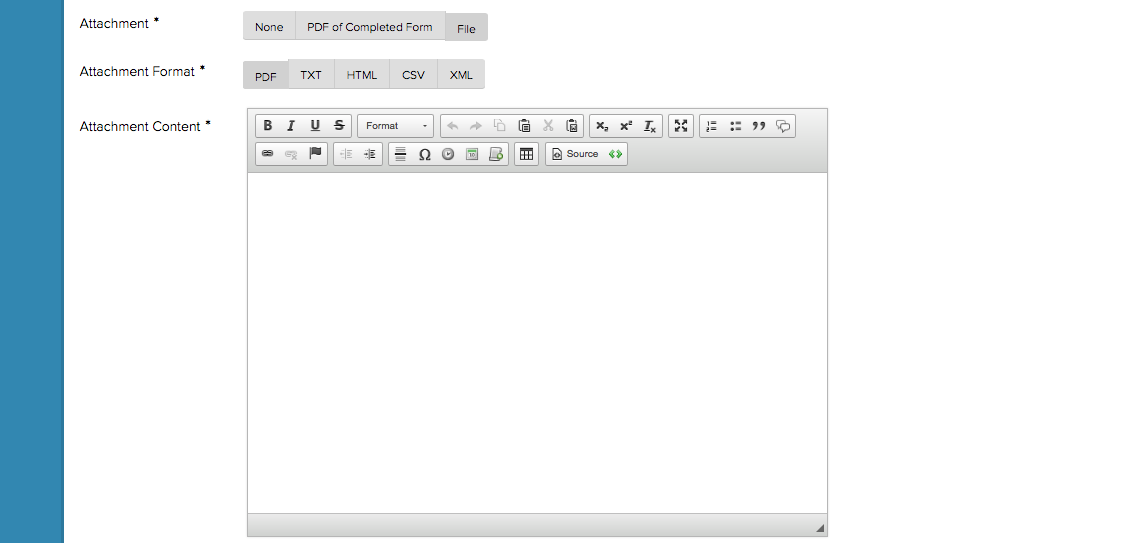 Creating an attachment
Assigning an Email Template to a route
Once your email template has been successfully saved, navigate back to the 'Routes' tab. To assign the template to form routes, tick the desired routes, open the 'Actions' menu and choose 'Add template to routes'. Select your template from the popup that appears, and click 'Add to Routes'. Alternatively, clicking the route name will open up the route details in a separate interface, where multiple templates can be added to it.
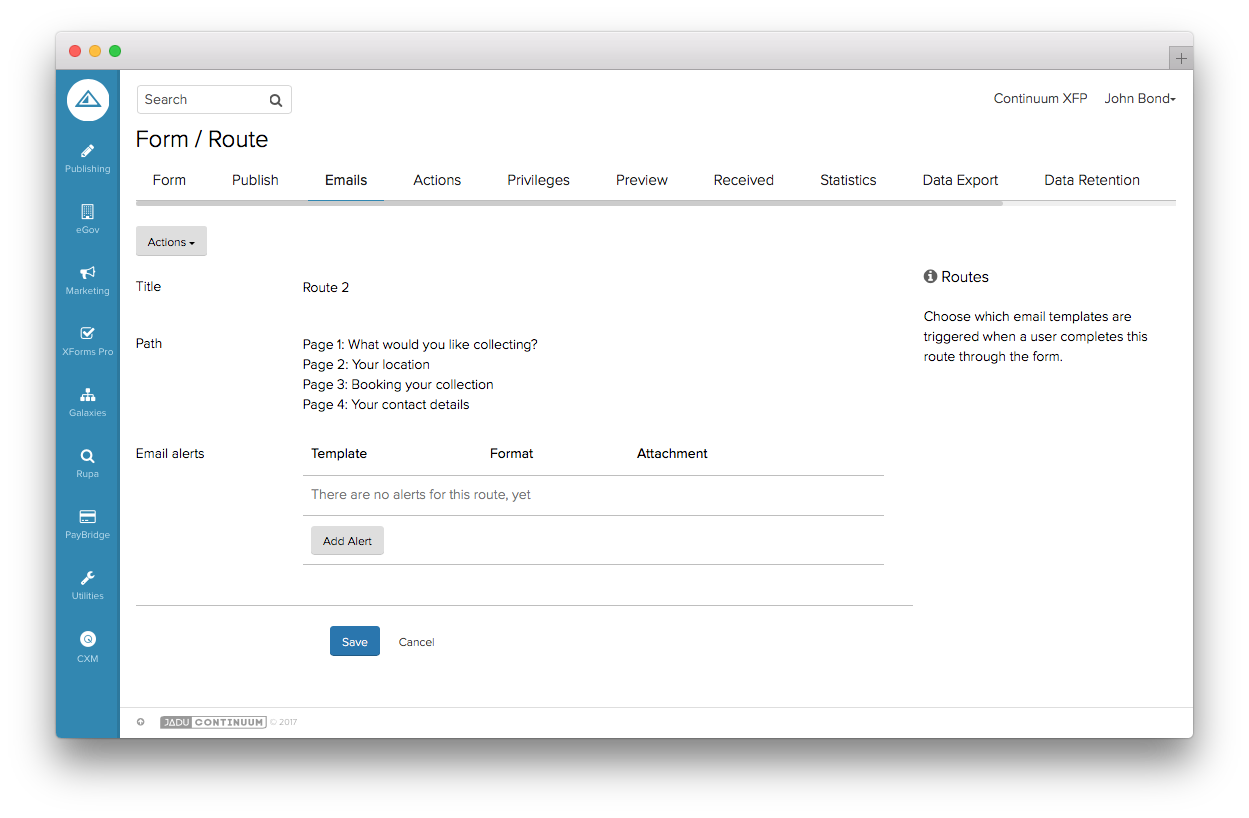 The route details interface