Office 365
Office 365 integration allows you to authorize an Office 365 account for use with Jadu XFP (e.g. event booking) and your own custom developments.
Once the API client ID and secret have been saved you will be able to click 'Authorize account' button to add a new account.
Office 365 integration uses Azure Active Directory (Azure AD) to access web services provided by Microsoft such as Office 365. Azure AD exposes two sets of endpoints, Azure AD and Azure AD v2.0, Jadu Continuum supports both, the one you use depends on your Microsoft account.
Deciding which Azure AD version to use
If you are unsure which API version to use log into your Microsoft Azure Portal
- Login to your office.com admin portal https://portal.office.com/adminportal/home#/homepage
- Under 'Admin centers' in the menu on the left handside, click on 'Azure AD'
If your Azure Portal looks like this:
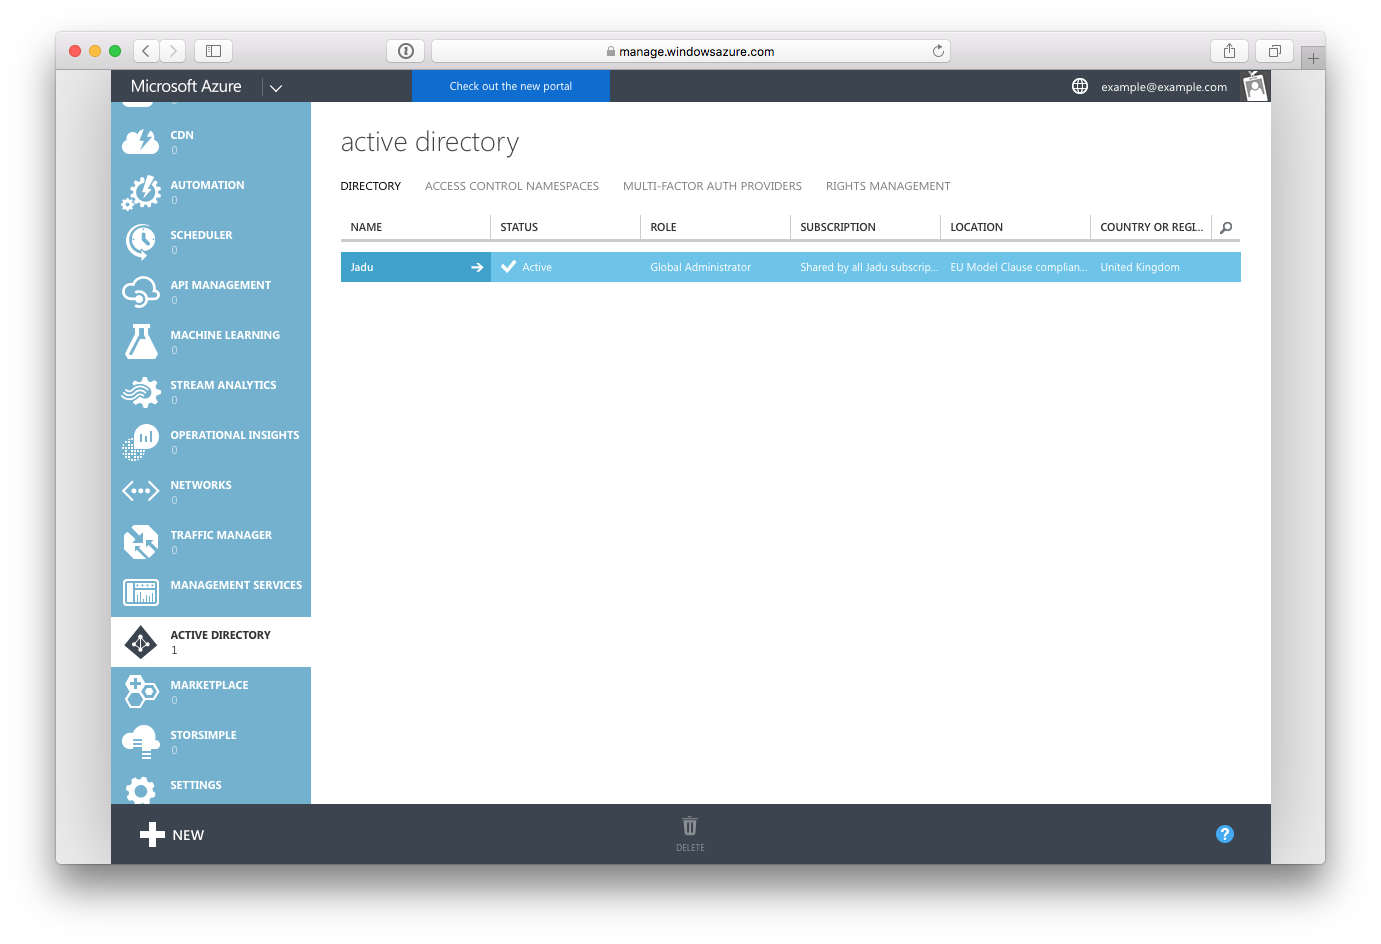
You should follow Generating Office 365 API Client ID and Secret (Azure AD) instructions.
However if your Azure Portal looks like this:
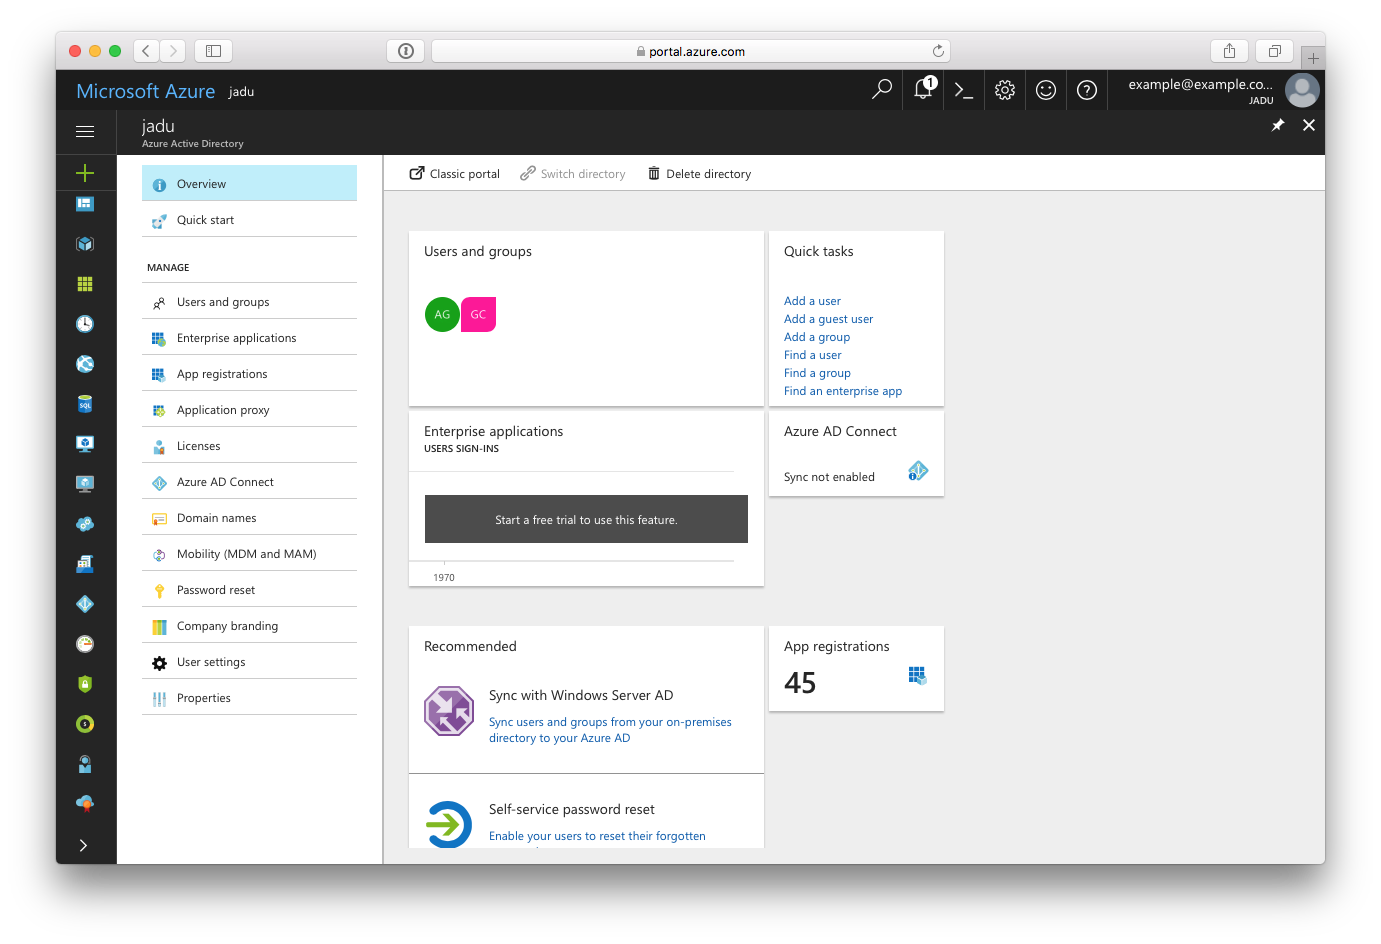
You should follow Generating Office 365 API Application ID and Key (Azure AD v2.0) instructions.
Generating Office 365 API Client ID and Secret (Azure AD)
To use the Office 365 integration a API Client ID and secret must be provided. These can be retrieved from Microsoft Azure portal.
- Login to your account on the Microsoft Azure portal https://manage.windowsazure.com
- Click on "Active Directory" in the menu.
- Click on the Activity Directory you would like to use.
- Click on "Applications" in the top menu.
- Click the "Add" icon at the bottom of the page and select "Add an application my organization is developing".
- Enter a name for your application, e.g. "Website" and Continue.
- Enter the OAuth end point URL (/jadu/integrations/office365/callback) in the "SIGN-ON URL" field, e.g. "https://www.jadu.net/jadu/integrations/office365/callback".
- Enter your website URL in the "APP ID URI" field, e.g. "https://www.jadu.net" and click Complete.
- Once the Application has created click "Configure" in the top menu.
- Make a note of the Client ID, this will be used as the client ID in the integrations hub.
- Create a new key by selecting a duration from the drop down (it will be visible after saving the application).
- Click "Save"
- Make a note of the key that is now shown, this will be used as the client secret in the integrations hub.
- Click "Add application" and select "Office 365 Exchange Online".
- Under "Office 365 Exchange Online" select "Read user calendars", "Read and write user calendars", "Read user and shared calendars" and "Read and write user and shared calendars" from the Delegated Permissions dropdown and "Read calendars in all mailboxes", "Read and write calendars in all mailboxes"
- Click the Save button.
Generating Office 365 API Application ID and Key (Azure AD v2.0)
Enabling Office 365 integration using Azure AD v2.0 (https://jadu.wistia.com/medias/ffqh4tsanz)
- Login to apps.dev.microsoft.com
- Click on the "Add an app" button
- Enter a name for your application, e.g. "Website" and Continue.
- Uncheck the "Let us help you get started" under "Guided Setup"
- Click "Create"
- Make a note of the "Application id", this will be used as the client ID in the integrations hub.
- Click on "Generate New Password" under "Application Secrets"
- Make a note of the generated key, this will be used as the Client secret in teh integrations hub.
- Click "Add Platform"
- Click "Web API"
- Click "Add Platform"
- Click "Web"
- Under the "Web" subsection enter the OAuth end point URL (/jadu/integrations/office365/callback) in the "Redirect URLs" field e.g. "https://www.jadu.net/jadu/integrations/office365/callback".
- Under "Microsoft Graph Permissions" remove any delegated permissions that are enabled and click "Add" to add delegated permissions.
- Choose "Calenders.Read", "Calenders.Read.Shared", "Calenders.ReadWrite", "Calenders.ReadWrite.Shared", "offline_access", "open_id" and "profile".
- Click "Ok"
- Click "Add" next to the Application Permissions
- Select "Calendars.Read" and "Calendars.ReadWrite"
- Click "Ok"
- Enter the OAuth end point URL (/jadu/integrations/office365/callback) in the "Home page URL" field e.g. "https://www.jadu.net/jadu/integrations/office365/callback".
- Uncheck "Live SDK support" under "Advanced Options"
- Click "Save"
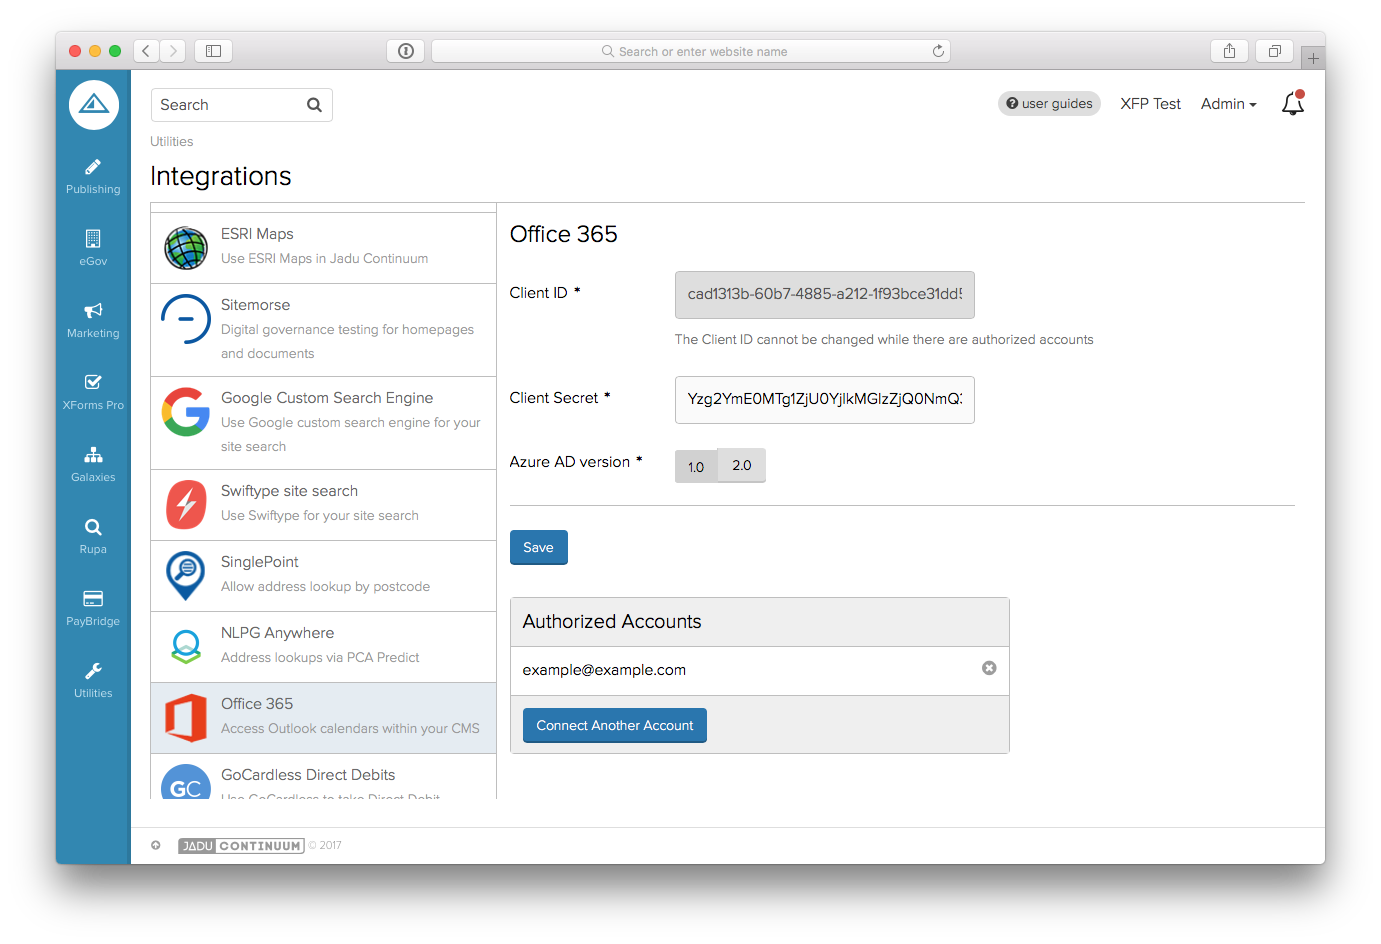
To configure the Office365 integration
Once you have your Client ID and Secret (Azure AD) or Application ID and Key (Azure AD v2.0) you need to add them to the Integrations Hub page.
- Navigate to Utilities > Integrations
- Select "Office365" from the list
- Enter the client values and choose the correct Azure AD version
- Click the Save button
- The Connect account button is now visible and you can connect individual Office365 accounts to interact with using the integration.
To authorise an Office365 account
- Sign into Office365
- Navigate to Utilities > Integrations
- Select "Office365"
- Click the Connect account button
- After the page refreshes, the email address of the Office365 account you are currently logged into will be added to the authorised accounts list.
Note: Outbound connectivity from the server through your firewall will be necessary to login.microsoftonline.com, outlook.office365.com on port 443.
To unauthorise an Office365 account
- Sign into Office365
- Navigate to Utilities > Integrations
- Select "Office365"
- Click the cross icon next to the account email address in the list
- A new form will open
- Click the Remove button