Exporting form submissions
Exporting form submissions/end user data is configurable. If you do not wish to have this functionality enabled, discuss this with your webmaster and subsequently Jadu Support if required.
To export form submissions, navigate into the relevant form and go to the Data Export tab.

Navigate to the Data Export tab of the form to extract data from
The data can be exported in either XML or CSV format and provides an interface for exporting specific pieces of data regarding the user’s form submission. Additionally, the data of each field can be formatted prior to export by selecting one of the available Pre-formatting routines. Please see the File Output Action section for details on each of the available Pre-formatting routines and CSV settings, etc.
To include a piece of data within an export, simply tick the corresponding Export checkbox to the data field name. To Pre-format that data, simply choose from one of the available Pre-formatting routines and where necessary, provide any supplemental settings e.g. Date formatting.
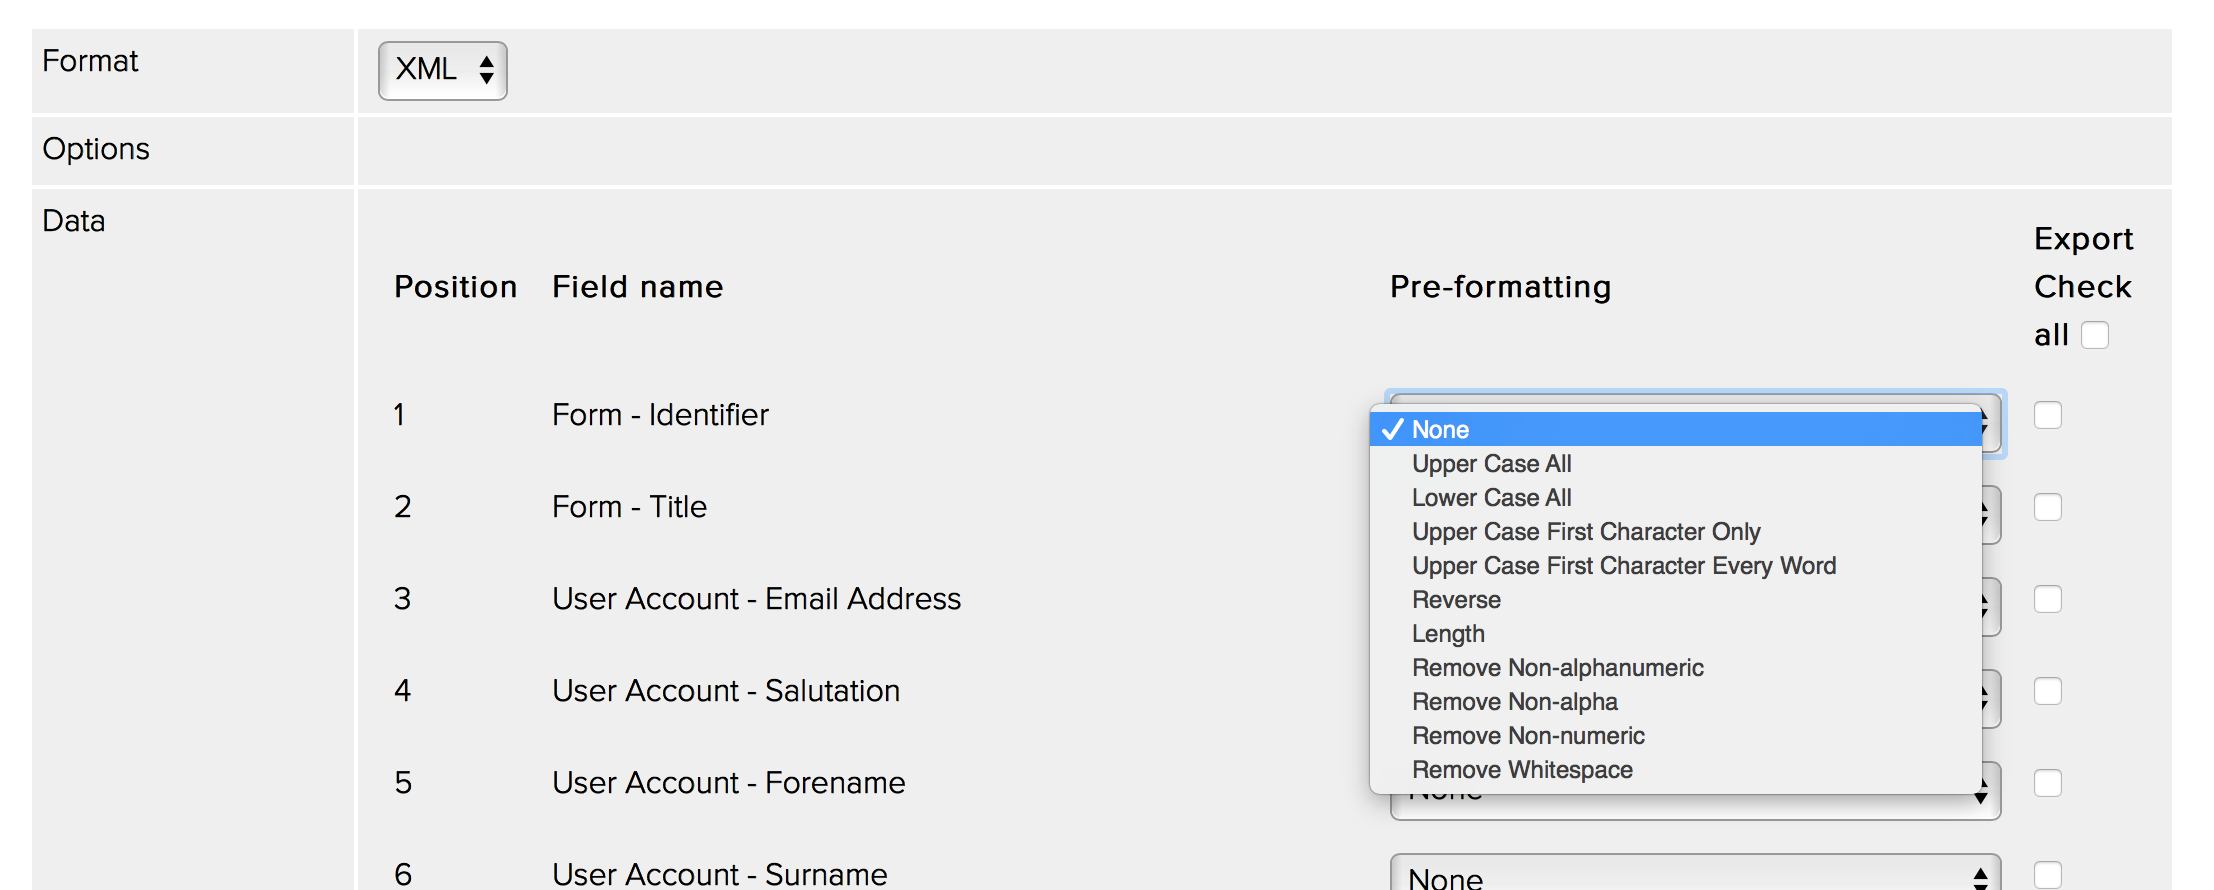
Applying pre-formatting rules to data that is to be exported
When you have configured which data is to be exported, you can choose to either perform a one off Manual Export or set up a Scheduled Export.
Manual Exports
When manually exporting form submissions, you can filter the data that is to be exported by Status and Date range or pre-defined Recent Period. You must select whether to export form submissions of status, i.e. Pending, In-progress, Completed - approved or Completed declined submissions and the period for which this data is to be extracted.
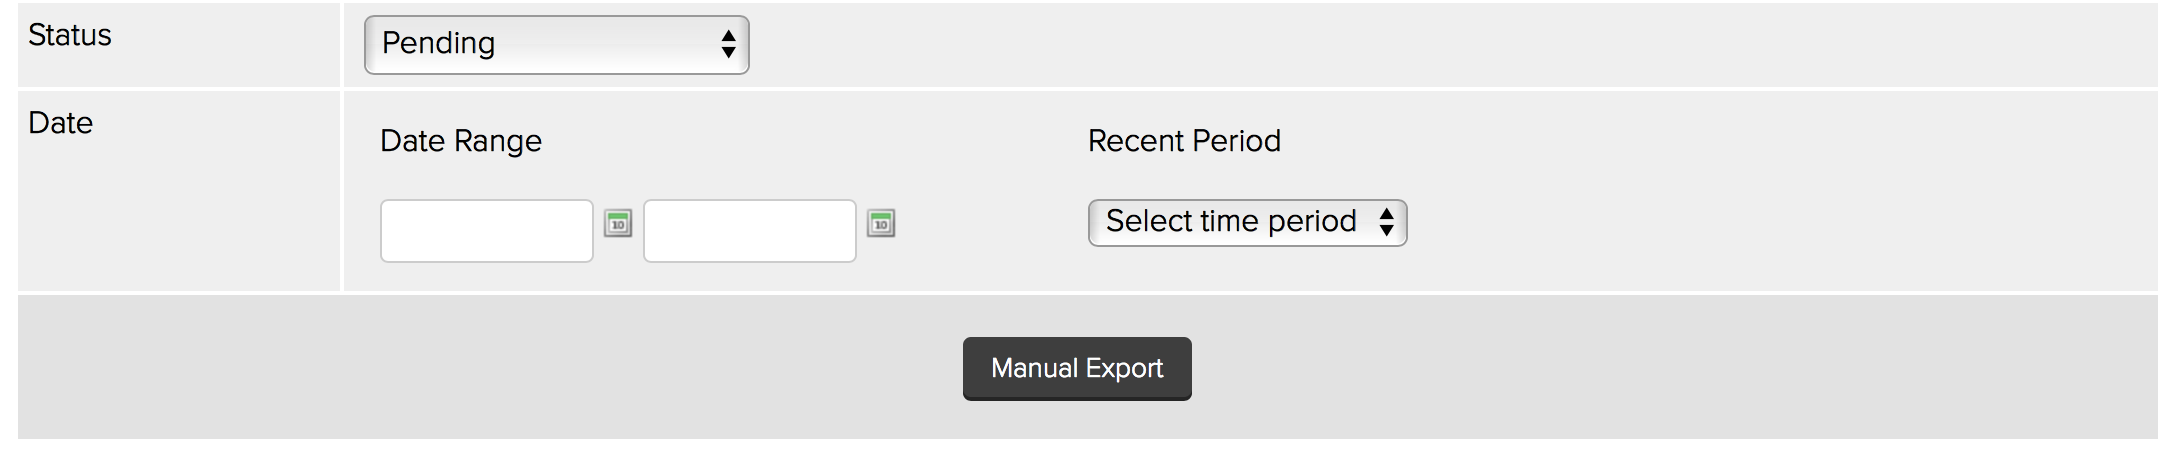
Filtering the data set to be exported
When the Manual Export button is clicked, you will be presented with the exported data preview, where you can check over the export contents. You can supply an alternative export file name to the one suggested by Jadu XFP if you wish to do so. Download the export file to your local machine by clicking the Export File button.
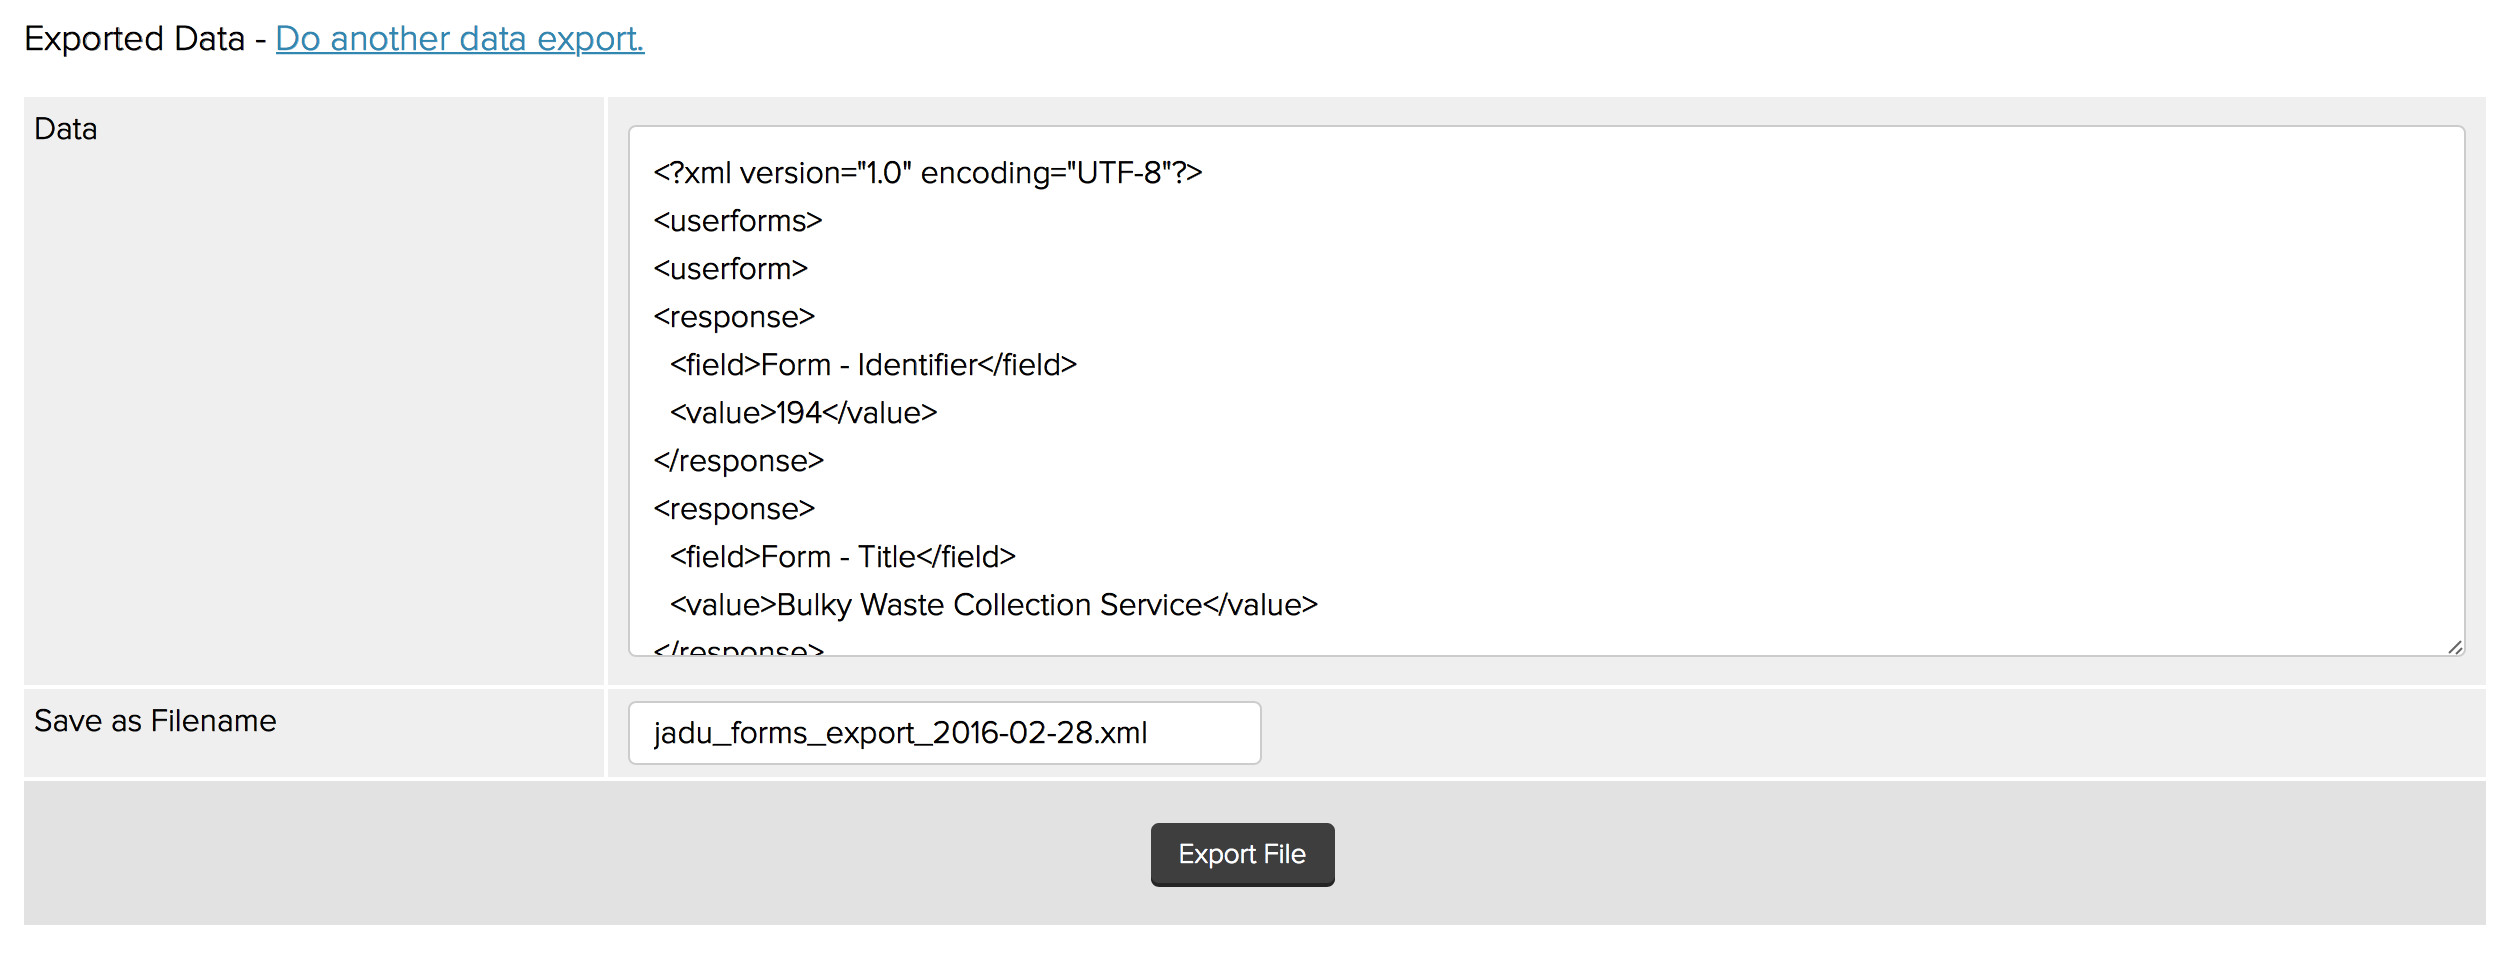
Previewing a sample of the exported dataExport schedule
Scheduled Exports
Export schedules allow you to run multiple export tasks per form according to a schedule. To set up an export schedule, click the Schedule Data button on the Data Export action page after you have set up you export criteria.
Existing schedules can be reviewed from the list of schedules on the Data Export page. Here you can see, edit and delete existing export schedules for the form. You can also create new export schedules by clicking on the New Scheduled Export button.

Review existing schedules from the data export page
As with the Manual Export, you can filter the data that will be exported by Status and pre-defined Recent Period.
You must select whether to export form submissions of status, i.e. Pending, In-progress, Completed - approved or Completed declined submissions and the period for which this data is to be extracted.
Data can either be emailed to a nominated email address (email addresses can be comma separated to email more than one recipient) or use a pre-configured File Output Connector to transfer the data instead. Select one or both output methods for the export file’s destination.
Choose when you wish the export to occur by using the Schedule section. You can schedule the export for Every Day or Every Week, at a specific time, or on a specific day of the week (when scheduled weekly). You can set the export to run Until a specified date only, or to run indefinitely by leaving this field blank.
Save the schedule by clicking the Save Schedule Export button.
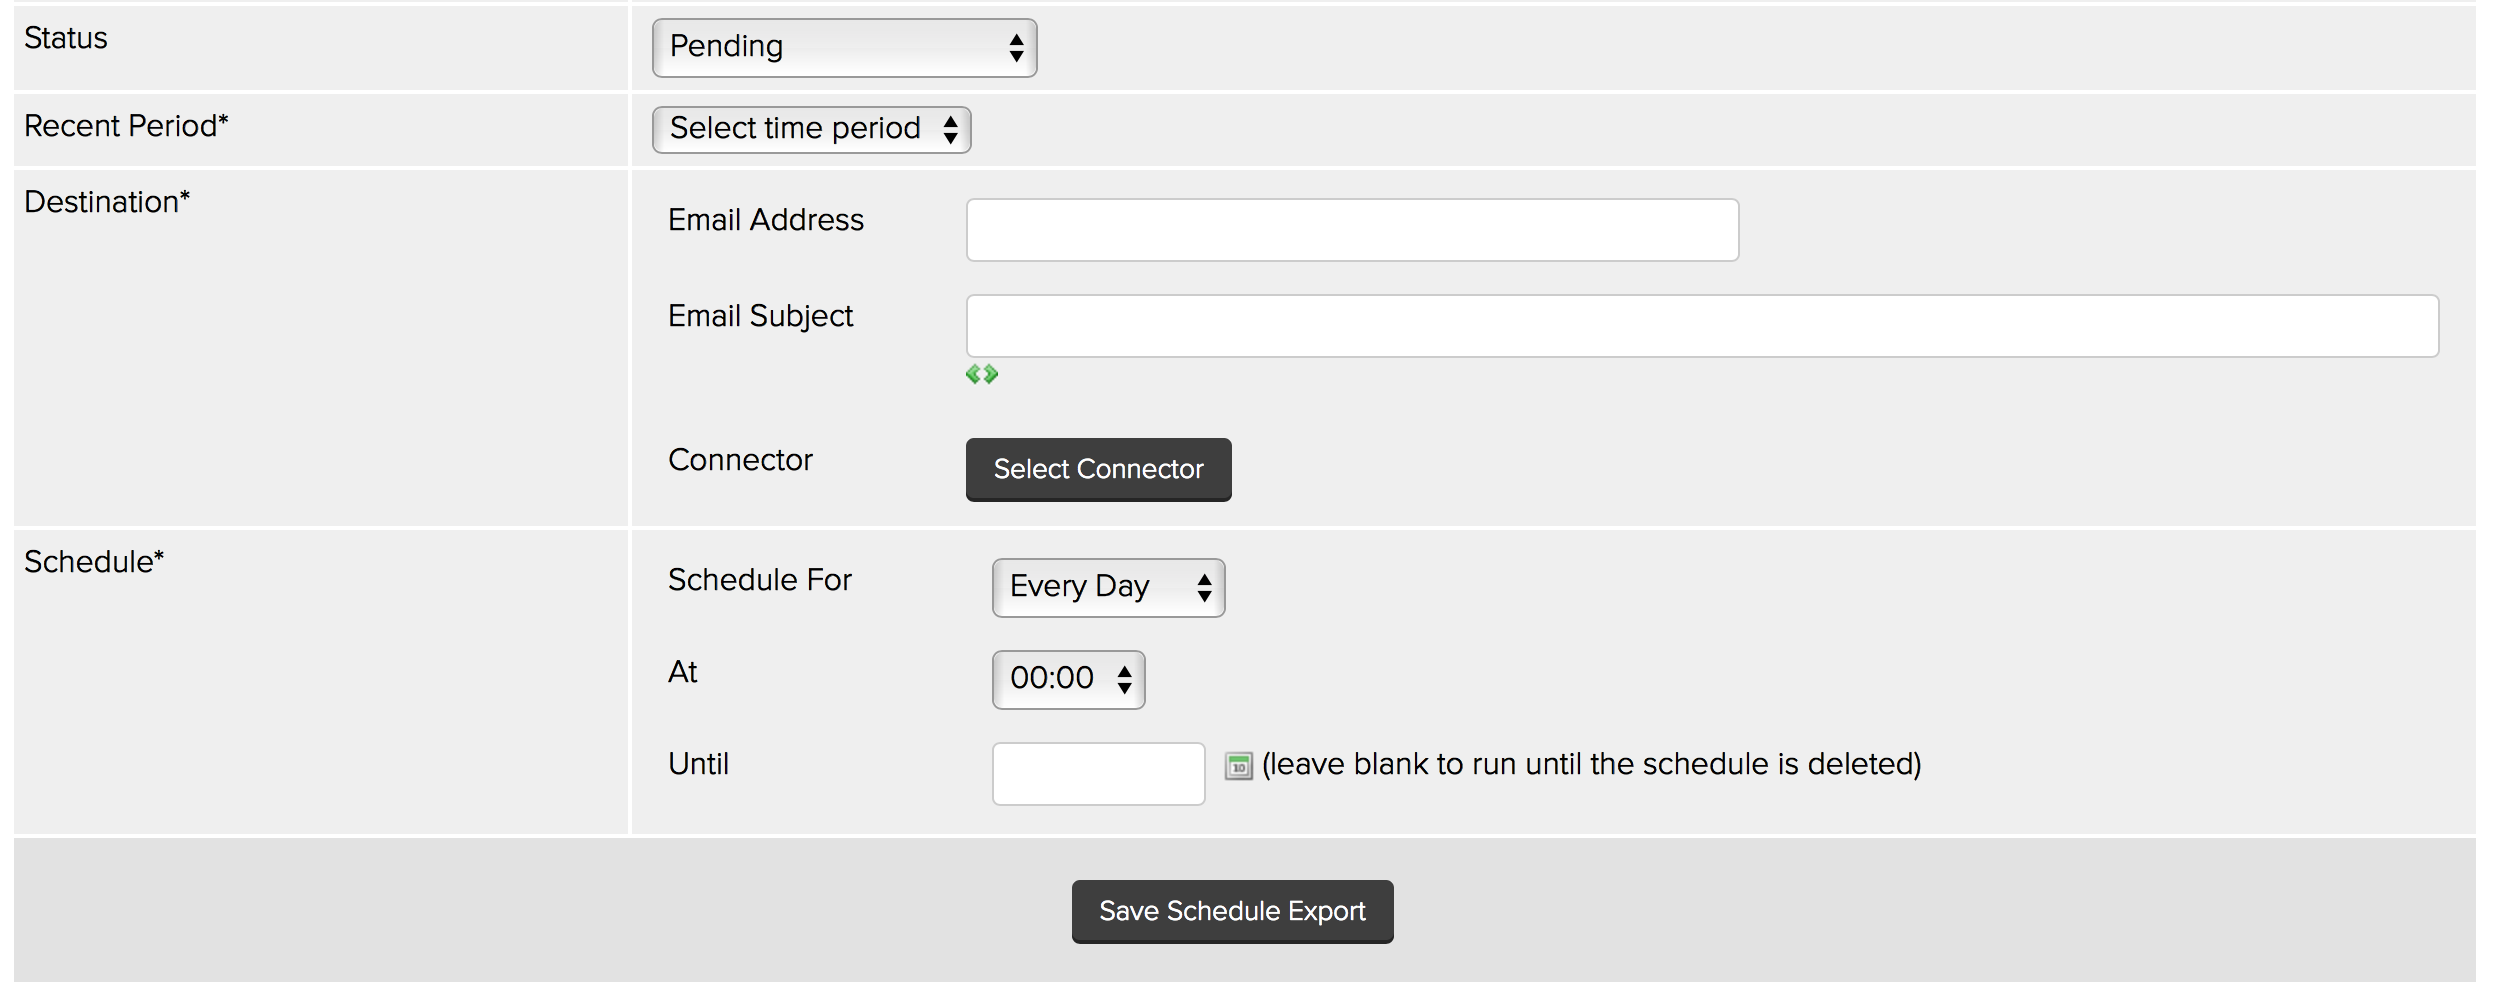
Setting up a scheduled export of data